Set Custom Object Effectivity Period
A Custom Object’s effectivity period governs when a Custom Object is considered to be active and available for use. To set the effectivity period:
-
Select Program from the top navigation bar, then select Custom Objects from the side navigation menu. The Custom Objects screen is displayed.
-
Search for and select the desired Custom Object (see Search for a Custom Object for more information on the available search options). The Custom Object Details screen is displayed, with the Definition tab selected.
-
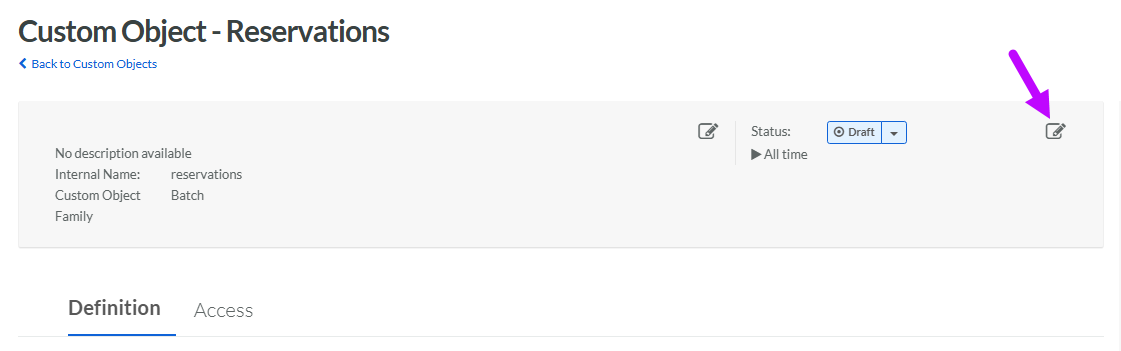
In the top-right corner of the header area, click the Edit icon. The Edit Custom Object pop-up window is displayed.
-
Next to Effectivity, select either:
-
Always: This Custom Object doesn't expire.
-
Scheduled: Enter a start date and end date, and select a time zone. Optionally, check Recurring to use a recurring schedule. Select the desired schedule from the Recurring Schedule drop-down menu, or define a new recurring schedule (see below for details on that process).
-
-
Click Save.
Recurring Schedule
To define a new recurring schedule:
-
From the Recurring Schedule drop down menu, select Enter Schedule. The Repeat pop-up window is displayed.
-
From the Count drop-down menu, select a recurrence frequency of either Weekly or Monthly.
-
In the text field, enter the interval. Enter 1 if you want the schedule to run every week, or every month.
-
For a Weekly frequency, select one or more days of the week. For example, Tuesdays and Thursdays.
-
For a Monthly frequency, choose one of the following options:
-
Day of month: Select one or more days of the month. For example, the 15th and the 30th.
-
Day of week: Select one or more days of the week, for each of the four weeks within a month. For example, the second Wednesday of the month.
-
-
Click Confirm. The system adds the new schedule to the Recurring Schedule drop-down menu.